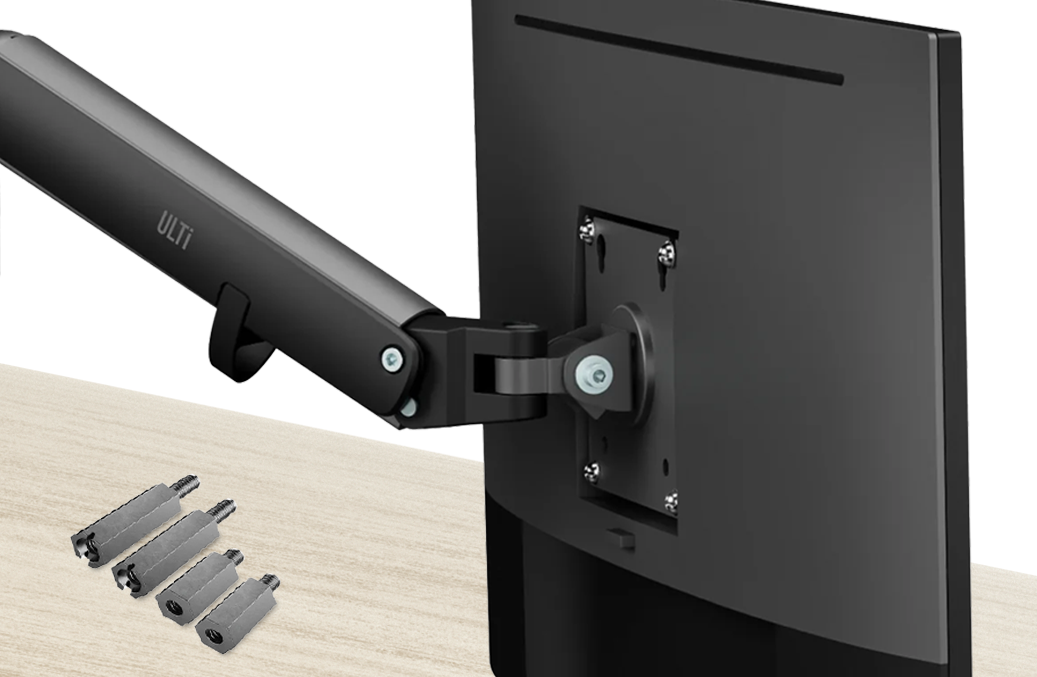
Step-by-Step Guide When mounting your monitor to a stand or arm, you may encounter issues where the back of your monitor isn't flush with the mounting bracket due to recessed screw holes or uneven surfaces. This is where spacer screws come in handy. In this guide, we’ll walk you through how to set up spacer screws for a secure and level mount.
What Are Spacer Screws?
Spacer screws are small cylindrical components used to create a gap between your monitor and the mounting bracket. They are essential for preventing damage to your monitor when mounting and ensuring a level fit.
Important Note:
Spacer Screws are included in the Monitor Box. Unlike other screws or parts that may come with your monitor arm or mounting bracket, spacer screws are typically included in your monitor’s packaging.
If you cannot find them in your monitor arm kit, it's likely because they are packaged with your monitor, not the arm.
What to Do If You've Misplaced the Spacer Screws?
If you’ve misplaced the spacer screws, don’t worry! Check with the vendor or retailer where you purchased your monitor. Many manufacturers provide replacement parts upon request, so you can easily get a new set of spacers if needed.
Why You Need Spacer Screws Prevents Monitor Damage?
Spacer screws help prevent the monitor from being damaged when tightening screws directly into recessed mounting holes.
Even Mounting: They help level the monitor and avoid wobbling.
Secure Fit: Spacers are often required for proper VESA mount compatibility when the back of the monitor has uneven surfaces.
What You’ll Need:
- Monitor mount or Arm Spacer Screws (Included with your Monitor Packaging)
- Screws compatible with your monitor’s VESA mount
- Screwdriver or Allen key
Step-by-Step Instructions to Set Up Spacer Screws:
Step 1: Locate Your Spacer Screws Spacer screws are generally included in the box your monitor came in. These should be used for proper mounting, especially if your monitor has recessed screw holes. Check your packaging before starting the installation.
Step 2: Position the Spacer Screws Place the monitor face down on a soft surface. Position the spacer screws over the VESA mounting holes on the back of the monitor. These spacers will create a slight gap between the monitor and the mounting bracket.
Step 3: Attach the Mounting Bracket Align the mounting bracket or arm’s plate with the VESA holes on your monitor. Hold it steady while you prepare the screws.
Step 4: Insert the Screws Using the screws provided with your mounting kit, insert them through the holes in the mounting bracket and through the spacer screws. Be sure the screws are the correct length—long enough to secure the mount, but not too long to damage the monitor.
Step 5: Tighten the Screws Use a screwdriver or Allen key to tighten the screws. Ensure that they are evenly tightened to avoid putting too much pressure on one side, which could lead to damage. Make sure the monitor is secure, but don’t overtighten.
Step 6: Check the Stability Once all the screws are tightened, check the stability of the monitor mount. Make sure the monitor is level and securely mounted. If the monitor wobbles or feels loose, adjust the screws accordingly.
Bonus Tip:
Double-Check Weight Capacity Always ensure that the mounting solution can handle the weight of your monitor. Spacer screws can change the fit slightly, so verify that the arm or stand can still support the monitor's weight.
Conclusion:
Setting up spacer screws on your monitor is a simple but important step for ensuring a safe and even mount. Spacer screws are typically included in your monitor’s packaging, not with the monitor arm. So, be sure to check the original box before proceeding with installation. If you’ve misplaced them, reach out to the vendor where you purchased your monitor for replacements.


Share:
Benefits of Monitor Arms
Different Types of Monitor Arms for Your Workspace